Thursday, October 21, 2010

Autumn Salad


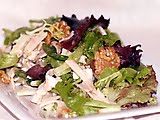
The sizzling days of summer are not the only times that a cool and luscious salad is in order. A rather hot Indian Summer day inspired me to fix this salad that I have enjoyed over the years (and have changed ingredients from time to time to fit my mood). The smoked turkey is easy, too, if you purchase a thick slice at the deli, instead of having to roast one yourself, and makes for a quick and simple dinner or luncheon salad.

Smoked Turkey, Apple and Roasted Walnut Salad

1 lb. smoked turkey, cut into strips

2 tart apples, cored and diced

3 celery stalks, sliced

3 cups watercress, chopped

Lemon Dijon Dressing (recipe follows)

Salt and pepper

Mixed spring greens

½ cup walnut halves, toasted

Toss the turkey strips, apples, celery, and chopped watercress in a bowl. Pour on Lemon Dressing (reserve a scant amount for drizzling on greens), and toss again. Season to taste with salt and pepper. Cover and refrigerate for no more than 4 hours.

Make a circle around edge of four plates with mixed greens and drizzle with a small amount of reserved Lemon Dressing. Mound the chilled salad in the center and then sprinkle with the walnuts.

Lemon Dressing

3 tsp. fresh lemon juice

2-3 tsp. Dijon mustard

1 egg yolk

1/8 tsp. salt

1/8 tsp. pepper

¼ cup olive oil

¼ cup canola oil

Combine lemon juice with the mustard, egg yolk, salt and pepper. Whip until thickened. Add the oils slowly, until thickened.


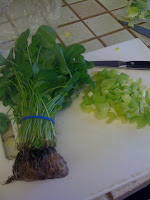
Very fresh watercress from the local produce market, complete with roots…how fresh is that?

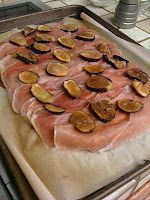
I love how the watercress tastes with the smoked turkey and Dijon…a great combination of flavors. I served it up with these hickory bacon and corn gougères to complete the Indian summer theme. They are great served warm out of the oven but are also quite tasty at room temperature. (They also keep for three days, well covered., so great as a make-ahead item.)

Hickory Bacon and Roasted Corn Gougères

4 hickory-smoked bacon slices (about ¼ lb.)

¾ cup fresh corn kernels (from about 2 medium ears)

1 cup water

4 oz. unsalted butter, cut into tablespoon pieces

¼ tsp. salt

1 cup flour

4 to 5 large eggs

1 ½ cups coarsely grated extra-sharp Cheddar cheese (5 oz.)

2 Tbl. grated Parmesan cheese

2 Tbl. finely chopped chives

Preheat oven to 375º with racks in upper and lower thirds. Cook bacon in skilled over medium heat, turning occasionally, until crisp. Drain on paper towels, then finely chop.

Pour fat from skillet, then wipe clean. Add corn and pan-roast over med. heat, stirring occasionally, until kernels are mostly golden brown, 10-15 min.

Bring water to a boil with butter and salt in a heavy medium saucepan, stirring until butter is melted. Add flour all at once and cook over medium heat, stirring vigorously with a wooden spoon, until mixture pulls away from side of pan, about 2 min. Remove from heat and cool slightly, about 3 min. Add 4 eggs, one at a time, beating well after each addition. (Batter will appear to separate at first but will them become smooth). Mixture should be glossy and just stiff enough to hold soft peaks and fall softly from a spoon. If batter is too stiff, beat remaining egg in a small bowl and add to batter 1 tsp. at a time, beating and then testing batter until is reaches proper consistency. Stir in bacon, corn, cheese, chives and ½ tsp. pepper.

Line 2 large baking sheets with parchment paper. Fill a pastry bag fitted with 1/2” plain tip with batter and pipe about 35 (3/4” diameter) mounds, or spoon mounded teaspoons, ¼” apart, onto each sheet. Bake, switching position of sheets halfway through baking, until puffed, golden, and crisp, 25-30 min. total. Transfer to rack (still on parchment if using) and cool. Make more puffs on cooled baking sheets.

*note: These can be made ahead and cooled completely, uncovered, then chilled in sealed bags 2 days or frozen up to 1 week. Reheat, uncovered, on baking sheets in 350º oven for 10 min if chilled or 15 min. if frozen.

Makes about 140 puffs

FUN NOTE: I have often fixed them as an hors d’oeuvres with cocktails. Makes a LOT, which is easy on the wallet, and is an unusual but simple bar food. Looks dramatic piled high on a pedestal plate or spilling out of an autumn basket.

Enjoying the first days of fall and looking forward to spending more time in the kitchen…hopefully, with my daughter sometime (hint, hint, Meg).

--The Mother

Monday, October 4, 2010

Fresh and Local – and Making it Last

I try to hit up the farmer’s market on most weekends, because the ingredients I bring home automatically enhance my cooking without any extra work. The only hard part is that I tend to get distracted while I’m there, and often find myself in a frenzy over which amazing products I want to use. My inability to get in-and-out of the market in less than 30 minutes immediately rules out any chance I might ever have to be a contestant on Top Chef or Master Chef. It’s best if I’m given the freedom to wander the aisles and contemplate my menu decisions. It’s also best if my husband isn’t with me when I go, as it could be a monumental test of his patience.

At a recent visit, I picked up some delightfully fresh produce – some heirloom tomatoes, nectarines, corn on the cob, and zucchini - to name a few. It’s amazing how far a few tomatoes will go, and it was even more amazing that I was able to use all the farmer’s market produce without anything going bad. I don’t have the luxury of shopping every day for our food, so anything I can buy that lasts more than a day, is an exciting thrill for me.

While I don’t have any specific “recipes” to share, I wanted to highlight the variety of meals I was able to achieve with just a few items from my farmer’s market trip, and anything I already had on hand in the pantry:


Salad w/ Nectarines

- Bed of mixed greens

- Sliced nectarines

- Sliced salami

- Dressing: Olive oil and juice from an orange and lemon


Heirloom tomato salad

- Heirloom tomatoes

- Corn on the Cob

- Zucchini

- Basil

- Olive Oil

- Lemon


Zucchini and Tomato Gratin

- Tomatoes

- Zucchini

- Olive Oil

- Thyme

- Parm cheese


And the list goes on. I may not be able to construct every meal with the freshest ingredients and local products, I’m a working lady for goodness sake, but I can incorporate these throughout my week efficiently and cost effectively. I think I spent about $30 at the market that day. That’s about the cost of what - 3 frozen pizzas at Safeway? Given the option, I’d much rather have an heirloom tomato salad, wouldn’t you?


-- the daughter

Thursday, September 2, 2010

Pizza My Heart


All of my favorite things, loaded on to a simple crust, makes for a pizza to fall in love with: fresh, seasonal figs, thinly sliced prosciutto, pungent and yummy gorgonzola cheese, a hint of balsamic and topped with fresh, peppery arugula. Sighting a display of figs at the farmer’s market this week, I was inspired to use them in this Bon Appétit recipe. While I usually like to prepare my pizza dough from scratch (see below), I knew I had some Trader Joe’s fresh-packaged variety in my frig. I also remembered that I had quite a bit of spinach in the crisper so I substituted it for the arugula (the arugula is really better on this but the spinach was a nice change).

Pizza with Prosciutto, Figs, Gorgonzola and Arugula

Cornmeal (for sprinkling)*

1 lb. pkg. purchased pizza dough**

2 cups (generous) crumbled Gorgonzola cheese (about 8 oz.)

6 small fresh figs, cut into about 1/3” thick slices

2 Tbl. balsamic vinegar, divided (use fig balsamic, if you can)

8 thin slices prosciutto

1 Tbl. extra-virgin olive oil

8 cups arugula

Preheat oven to 450º. Sprinkle large rimless baking sheet generously with cornmeal. Roll out dough on floured work surface to 12 X 10 inch rectangle; transfer to prepared sheet. Sprinkle Gorgonzola over dough. Sprinkle with pepper. Place figs in medium bowl and drizzle 1 tablespoon vinegar over. Set aside.

Bake pizza until crust is golden brown on bottom, 15 to 20 min. Immediately drape prosciutto slices over, covering pizza completely. Arrange fig slices atop prosciutto. Bake until figs are just heated through, about 1 min. Transfer pizza to cutting board. Whisk remaining 1 tablespoon vinegar and oil in large bow; add arugula. Sprinkle with salt and pepper; toss to coat. Mound salad atop pizza. Cut into pieces and serve.

*I didn’t have any cornmeal on hand so skipped using it to prep pan and the pizza did fine. Source: Bon Appétit

**Pizza Dough

1 pkg. active dry yeast

1 ¼ cups lukewarm water

3 cups unbleached flour

1 ½ tsp. salt

1 Tbl. olive oil

In large mixing bowl, dissolve the yeast in ½ cup lukewarm water. Let it proof for 10 min. Add the flour, salt, olive oil and remaining water. Mix well and knead until the dough is smooth, about 10 min. This can be done by hand or with an electric mixer with a dough hook. Add more flour as necessary to make a smooth, silky dough.

Put the dough in an oiled bowl, cover with a cloth, and set aside in a warm place until it doubles in bulk. This should take 1 hour or longer. Punch down the dough and let it rest for another 10 min. It is now ready to proceed with rolling into a “regular” pizza or –continue with recipe above--

----------------------------

I think the “draping” of prosciutto to enclose the whole pizza is such an interesting way of offering up something different. This was plenty for dinner since it even had the salad atop, but it would also be a good accompaniment to a great bowl of minestrone or other favorite Italian soup.

Give it a taste and you’ll see why it’s won its way into our heart.

--the Mother


Wednesday, August 11, 2010

Not Just Your Run-Of-The-Mill Burger

Meg may have wanted to shed the “Monday Blues” with her dinner but I also think Wednesday’s “hump day” deserves some effort…burgers, you say? Think about making them a little differently. One direction I like to take is to use ground chicken instead of the usual ground beef.

Chicken burgers are so lean and delicious, but they also tend to need a little help in the taste department. I like to caramelize shallots and add a little blue cheese to the offering. Simple ingredients can provide temptations to the tastebuds, while being mindful of the grocery list’s bottom line.

Chicken Burgers with Caramelized Shallots and Blue Cheese*

2 shallots

olive oil

1 lb. ground chicken

one garlic glove, minced

1 tsp. chopped fresh rosemary

1 tsp. freshly ground black pepper

½ tsp. salt

4 kaiser or ciabatta rolls, toasted

Leafy lettuce

¼ cup mayonnaise

¼ cup crumbled blue cheese

Caramelize the shallots in a little olive oil. Remove from pan and set aside.

Mix the ground chicken, garlic, rosemary, pepper and salt; then form into four patties. Brown in same pan with 1 tbl more olive oil. While burger is cooking, mix the mayonnaise and crumbled blue cheese til blended.

Serve burgers on toasted rolls with shallots, lettuce and a dollop of the mayo-blue cheese mixture.

*source: adapted from a Sunset magazine recipe

Served this mid-week sensation with a side of a large slice of beefsteak tomato, drizzled with a little light Italian dressing and topped with roasted corn. A little cold and hot side combo that seemed to work. Tomato was luscious and in-season and the roasted corn added a hot companion to an otherwise mundane side dish.

I had an extra chicken burger patty left over. Can’t wait to have it tomorrow, accompanied by another slice of tomato, as a great and light lunch. Total burger enjoyment…without the guilt. Maybe I’ll open my own burger stand someday. I think I’ll name it “Burger Queen”.

--the Mother

Tuesday, August 3, 2010

A Case of the Mondays

On the bus home from work on Monday, I was tired and frustrated with my day. I just wanted to go home and plop myself on the couch and do nothing, but I thought…what better way to shed the Monday blues than a home cooked meal? Since I was lazy and didn’t make it to the grocery store over the weekend, my only option was to scrounge around the kitchen to see what I could find. When I got home, I opened Rachel Ray’s cookbook to see if I could get inspired with the ingredients I had on-hand. I’ll admit she’s got some interesting dishes that are do-able for a working woman - although I can only make her meals in less than 30 minutes if I'm literally running around the kitchen to beat the clock.

I found a recipe for turkey cutlet with some pesto, tomato, and mozzarella topping. Not only did it sound delicious, but I had all of the ingredients to complete the dish (though I actually substituted the turkey for chicken). First, I opened a bottle of wine because I simply can’t cook without it! Then I pulled together the ingredients for the chicken cutlet, and also brought out a rice mix from Trader Joe’s to accompany the chicken. It was a fairly easy recipe to follow, and in the end my husband gave it a raving 4 stars!

Italian Chicken Cutlet
Olive oil (about 2-3 tablespoons)
1 onion, chopped
3 garlic cloves, chopped
3 tblsp flour
1 egg
1/2 cup breadcrumbs
handful parmesan
1/4 cup flat-leaf parsley (I actually didn’t have any of this on hand, so I used oregano. I'm sure any Italian herb would work fine.)
2 chicken breasts – pounded flat or butterflied
1 pint grape tomatoes
½ cup white wine
½ cup pesto (store bought)
Mozzarella slices
S & P

Heat medium skillet over medium heat with oil. Add onions, garlic, S&P and cook about 3 minutes. Meanwhile, place flour in shallow dish, beat egg and put in 2nd shallow dish, then combine breadcrumbs, parsley, and parmesan into 3rd shallow dish. Heat olive oil in large skillet. Season chicken with S&P, then cover with flour. Then thoroughly coat chicken in eggs then lastly in the breadcrumb mixture. Once skillet is hot enough, cook chicken for 3-4 minutes per side. Remove the cutlets and set aside on paper towels.

In the skillet with the onions, add the grape tomatoes and white wine. Continue to cook until tomatoes start to burst and wine is reduced by half. Preheat the broiler. Arrange cutlets on a cookie sheet, then top each with the tomato topping, a scoop of pesto, and a few slices of mozzarella. Place under the broiler and broil until cheese melts. Serve warm with rice, if desired. Source: Modified from Rachel Ray, 365: No Repeats


With the Monday blues drowned out in Chardonnay and buried in pesto mozzarella toppings, I was ready to put Monday to bed and embrace the rest of the week. I guess it’s not so bad when you scrounge around in your kitchen for dinner options. You just need a little inspiration, a few good cooking staples, and some determination. I’d say it’s the best cure for a ‘case of the Mondays’.

--the daughter

Monday, July 19, 2010

Bon Appetit on Bastille Day

Bastille Day fell mid-week this year and, instead of a Wednesday ho-hum dinner, why not opt for a satisfying meal with a bit of French flare? One of my favorite cooks, Ina Garten, has a lovely Barefoot in Paris cookbook that makes French cooking accessible to all. I realize that was the premise of Julia Child’s work as well but, truth is, I have a serious aversion to objects suspended in aspic.

One recipe that had caught my eye when I first received the book was “Chicken with Forty Cloves of Garlic”…whew. As Ina says, “I know it sounds outrageous to cook chicken with forty cloves of garlic, but the garlic becomes very sweet and tender when it’s cooked for a long time”. I took her at her word and forged ahead.

Chicken with Forty Cloves of Garlic

3 whole heads garlic, about 40 cloves

2 (3 ½ lb.) chickens, cut into eighths

Kosher salt

Freshly ground black pepper

1 Tbl. unsalted butter

2 Tbl. good olive oil

3 Tbl. Cognac, divided

1 ½ cups dry white wine

1 Tbl. fresh thyme leaves

2 Tbl. flour

2 Tbl. heavy cream

Separate the cloves of garlic and drop them into a pot of boiling water for 60 seconds. Drain the garlic and peel. Set aside.

Dry the chicken with paper towels. Season liberally with salt and pepper on both sides. Heat the butter and oil in a large pot or Dutch oven over medium-high heat. In batches, sauté the chicken in the fat, skin side down first, until nicely browned, about 3-5 min. on each side. Turn with tongs or spatula (so you don’t pierce the skin). If the fat is burning, turn the heat down to medium. When a batch is done, transfer to a plate and continue with remaining chicken in batches. Remove the last chicken to the plate and add all of the garlic to the pot. Lower the heat and sauté for 5-10 min, turning often, until evenly browned. Add 2 tablespoons of the Cognac and the wine, return to a boil, and scrape the brown bits from the bottom of the pan. Return the chicken to the pot with the juices and sprinkle with thyme leaves. Cover and simmer over the lowest heat for about 30 min., until all the chicken is done.

Remove the chicken to a platter and cover with foil to keep warm. In a small bowl, whisk together ½ cup of the sauce and flour and then whisk it back into the sauce in the pot. Raise the heat, add the remaining tablespoon of Cognac and the cream, and boil for 3 min. Add salt and pepper to taste. Pour the sauce and garlic over the chicken and serve hot.

********

Ina was true to her word…the garlic was subtle and perfect tucked up next to the chicken. The sauce was incredibly rich, despite the fact that the recipe only called for 2 tablespoons of heavy cream. I would consider this a company-worthy entreé, served with a nice rice-combo type mix (Trader Joe’s has several mixed rice varieties that are nice), a light salad, some crunchy French bread and a nice bottle of wine (French on Bastille Day, of course).

We ended the meal with an interesting dessert. Having recently returned from a trip to the coast of Maine, we made the “required” stop at Stonewall Kitchen to ponder over the extensive selection of jams, chutneys, sauces, rubs, and so forth. Snatching up a jar of Kir Royale Jam and their recipe card for “Kir Royale Sorbet”, it seemed the perfect light, refreshing summer conclusion to our meal.

Kir Royale Sorbet *recipe from Stonewall Kitchen

2 cups water

1 cup sugar

1 jar Stonewall Kitchen Kir Royale Jam

Make a simple syrup by combining the water and sugar in a saucepan over medium-high heat. Bring to a boil. Reduce heat and stir until the sugar is dissolved. Remove from heat.

Place 1 jar of Kir Royale Jam in a food processor. Using a metal blade, process jam until currants are fine pieces. Add puréed jam to the simple syrup and mix until uniform. Chill for at least 1 hour in refrigerator.

Place chilled mixture in an ice cream maker. Process for 30-35 min. until the sorbet is thick and creamy. Freeze for 8 hours or overnight before serving. Can be kept frozen for one week.

**********

I served the sorbet in chilled martini glasses with a sprig of mint and a small plate of dark chocolate truffles. For one evening, my husband and I felt like we had traveled to Paris…just without the jet lag.


--The Mother

Sunday, June 27, 2010

Cooking for Dad

My mother always told me the way to a man’s heart is through his stomach. Well, I’m pretty sure I already have my dad’s heart, as well as my Father-in-law’s, but I figured for Father’s Day we should treat them to a feast!


Mom and I decided to tackle the menu & cooking together - coordinating the menu from the appetizers to the dessert course. Then we divvied up the dishes and grocery shopping, and met up in the kitchen to construct the meal. So this time, it really was Mother and Daughter…in the SAME kitchen.


The Menu:

Apps:

Fried Green Olives Stuffed with Cheese

Wood Grilled Artichokes

Lime Drizzled Shrimp


1st Course:

Spinach salad with Avocado, Apples, and Bacon


Main Course:

Filet Mignon with Roquefort Butter

Vegetable Tian


Dessert:

Chocolate Tart with Chocolate glaze, and homemade vanilla ice cream


There wasn’t a single thing on the menu that wasn’t a success. The men were groaning with delight, the ladies were giggling from the tasty wine (Dry Reisling, Trefethen Vineyards = yummy). The wine went perfectly with the selection of appetizers, recipes shown below:


Fried Green Olives Stuffed with Cheese

40(ish) Large Green Olives – pitted

Feta cheese (recipe called for Blue Cheese – but I substituted for Feta)

2 eggs, whisked

1 cup bread crumbs

½ cup flour

Olive Oil (or vegetable oil)


Stuff olives with feta cheese and set aside. Place the next three ingredients in three separate bowls. Heat oil in large skillet (with enough oil to reach approx 1 inch up the side of the pan). Dip olives in the flour, then egg, then bread crumbs. Once oil is hot enough, dunk the olives into the oil until fried (approx 30 seconds to 1 minute). Only do a handful of olives at a time to ensuring even cooking. Source: Bon Appetit Aug 2007


Sizzling Lime Shrimp


3 limes

1 lb. large prawns, shelled and deveined

3 tbl. olive oil

2 cloves garlic, finely chopped

splash of sherry

salt and pepper

3 tbl. chopped fresh flatleaf parsley


Grate the rind and squeeze the juice from two of the limes into a small bowl. Cut remaining lime into wedges for completed dish and set aside.


Rinse shelled and deveined shrimp under cold water, drain and dry well on paper towels. Heat olive oil in large, heavy skillet, then add garlic and cook for 30 seconds (careful not to burn it). Add the shrimp and cook for about 5 minutes, stirring from time to time, until they turn pink and start to curl. Mix in the lime rind/juice mixture, sherry to moisten and stir well.


Transfer cooked shrimp to serving dish, season with salt and pepper and sprinkle with parsley. Serve hot accompanied by lime wedges. (Be sure to set out a small dish for your guests to discard the shrimp tails as they eat).


We tend to stuff ourselves in the appetizer course, and Father’s Day was no different, but we did manage to reserve a little room for the dinner itself. So we uncorked a Cabernet Sauvignon, and headed to the dinner table. What came next truly won hearts…


-- the daughter

Tuesday, June 1, 2010

Flex Your Mussels with the In-Laws

Meg’s in-laws just returned from a fabulous trip to France (that’s redundant, isn’t it?). Her mother-in-law, Linda, is a gifted photographer and put together a slide presentation to share with us, along with a French-inspired dinner. When asked to contribute an appetizer, I decided it was time to flex some mussels.

While every bistro in Paris has some form of mussels on their menu, usually cooked in a pot of white wine (Moules Marinières), I opted for more of a stuffed and baked approach. It’s ultra-simple and even non-mussel-eating guests enjoy these.


Baked Mussels with Herb Garlic Butter

1 lb. fresh mussels (in shells)

¼ cup dry white wine

1 bay leaf

4 oz. butter

2/3 cup fresh French bread crumbs

5 Tbls. chopped fresh flatleaf parsley (plus extra for garnish)

3 Tbl. snipped fresh chives

3 garlic cloves, finely chopped

salt and pepper

lemon wedges

Clean mussels thoroughly, scrubbing shells as needed and making sure to eliminate any “beards” attached to them. Discard any with broken or damaged shells. Put mussels in strainer and rinse well in cold water.

Preheat oven to 400º. Put mussels in large pot and add the white wine and bay leaf. Cook, covered, over high heat for 4-5 min., shaking pan occasionally, or until mussels open up. Drain well and discard any that do not open up. Shell the mussels, reserving one half of each shell. Arrange mussels in their half-shells, in a large shallow baking dish.

Melt the butter and mix in small bowl with bread crumbs, parsley, chives, garlic and salt and pepper to taste; mix well. Let stand a couple minutes to allow butter to set slightly. Drop a teaspoon or so of the bread/garlic butter mixture onto each mussel, pressing down with fingertips lightly to enclose the mussel meat in the shell.

To serve, bake the mussels in the oven for 10-12 min, or until hot and bubbly. Serve immediately, garnished with flatleaf parsley sprigs and lemon wedges.

What a wonderful evening. The in-laws shared a delicious and light white wine they discovered in France, “Lascaux”, to accompany the mussels, moving on to this winery’s Pinot Noir for dinner. Great tastes, lively conversation and the ultimate pleasure of the evening…photos of France.


--The Mother

Wednesday, May 19, 2010

May Showers


Apparently April showers just brings more May showers. Instead of dusting off the BBQ and grilling up some springtime goodies, we’re stuck inside on another rainy day. The only thing that makes me feel better about the rain is that it gives me an excuse to cook up a big pot of soup for two! Seriously, I’m obsessed with soup – doesn’t matter what time of year.
I’ve been eyeing this recipe in the Williams-Sonoma Bride & Groom Cookbook, a gift our friends in Chicago gave us for our wedding (thanks Sean & Emily!). The recipe was for Thai Shrimp & Corn soup. Honestly, anything with shrimp and/or corn is a guaranteed winner with my husband, so this shouldn’t be too difficult. Perfect! Plus, there wasn’t a single thing in the recipe that I didn’t already have in my kitchen. Even better.

Thai Style Corn Soup with Shrimp
1 tblsp vegetable oil
1 small onion, chopped
2 slices fresh ginger (1/4 inch thick)
½ tsp kosher salt2 cups fresh corn kernels (or frozen corn kernels)
1 ¾ cups vegetable stock
1 can (14.5 oz) coconut milk
3 tblsp fish sauce
2 tblsp fresh lime juice
1 tblsp light brown sugar1 tsp lime zest½ tsp green curry paste, plus more as desired (see note below)
8 oz medium shrimp, peeled & deveined
3 tblsp chopped fresh basil or cilantro
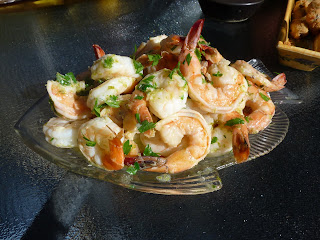
Heat oil in a medium sauce pan over medium heat. Add onion, ginger, and kosher salt. Cook, stirring occasionally, until onion is tender (5 to 7 minutes). Add corn, stock, coconut milk, fish sauce, 2 tblsp lime juice, brown sugar, lime zest, and the curry paste and bring to a boil. Reduce heat and simmer for 10 minutes. Add shrimp and cook until opaque (2 to 3 minutes). Remove ginger and stir in basil. Add more lime juice and curry paste if necessary.
Note: Must add more green curry than the recipe requires. Don’t be shy, really pile that curry on people!

Source: Bride & Groom First and Forever Cookbook
The soup is very “soupy”, so I’d suggest adding some jasmine rice or something to give it more structure. Unless you plan on mostly soaking it up with some bread, which we did, then no modifications required (other than the additional curry. Trust me on this).

And even though I made it for Sunday night dinner, when I had all the time in the world to cook, I think it’s a perfect mid-week meal because it doesn’t take much prep or cook time. So, in short, the soup was a hit with my husband – because of the shrimp & corn combo. And it was a hit with me too – because of the prep and cook time ease. Oh, and it was delicious too. I just figured that went without saying.

--the daughter

Saturday, May 8, 2010

A Plum Assignment


Though it might appear that my daughter and I are having “dueling desserts”, I was inspired by her recent yummy offering and decided it was time to crack open the newest cookbook (a gift from her) to see what desserts were seductively waiting to be made. Talk about inspired…I was enthralled with the book, “Earth to Table” (by Jeff Crump and Bettina Schormann) and devoured both text and photographs with equal enthusiasm.

What caught my eye was a luscious “Plum Tarts”recipe. While this book whose premise is seasonal, local fare, is sectioned into…you guessed it…seasons, I couldn’t resist the temptation to create these little beauties. I figured, we live in California…if we have to pay over a million bucks for a modest bungalow to live in, then we deserve to have produce a few weeks ahead of the rest of the country. Faulty a notion as that might be, I do appreciate that our farmer’s markets are so prevalent while the truck-ripened produce is relegated to the supermarket.

I came upon the most gorgeous dark-skinned plums, spilling out of a basket from one

of my favorite produce vendors. They positively glistened as I rinsed them in preparation for their final emergence, tucked delectably
within the folds of a sweet cookie-like crust, vaguely reminiscent of snickerdoodle cookies of my youth.

Plum Tarts

Tart:

8 plums, cut into wedges

2/3 cup sugar, divided

1 Tbl. ground cinnamon

All-purpose flour

1 recipe Pâte Sucrée (see below)

½ cup Frangipane (see below)

2 large eggs, lightly beaten

In a bowl, toss together plums, ½ cup sugar and cinnamon; set aside.

Line a large baking sheet with parchment paper or a silicone mat. Lightly sprinkle with flour and set aside.

On a lightly floured surface, divide pâte sucrée into 8 equal portions. Using a floured rolling pin, roll out into eight 7-inch rough circles. Transfer to prepared baking sheet. Spoon 1 Tbl. frangipane in the center of each dough circle and spread out evenly, leaving a 2” border. Place a scant 1 cup plum wedges in the center of each circle. Lift border of pastry up over filling, letting pastry fall naturally into folds. Brush sides with egg and sprinkle with the remaining sugar. Refrigerate for 10 min.

Preheat oven to 350ºF, with rack placed in bottom third of oven. Bake tarts until filling is bubbly and crust is golden brown, about 45 min. Let rest for 5 min. before serving.

Pâte Sucrée:

2 ½ cups all-purpose flour

3 Tbl. sugar

2 tsp. salt

1 cup cold unsalted butter

2 large organic egg yolks

¼ to ½ cup ice water

In a bowl, combine flour, sugar and salt. Using a box grater, grate butter into the flour mixture. Toss together, like a salad, using your fingers.

In another bowl, whisk together egg yolks and water. Add to flour mixture, a few tablespoons at a time, kneading dough until it comes together.

Shape dough into a disk, wrap in plastic wrap and refrigerate until chilled, about 1 hour.

(Make ahead: Wrap in plastic and refrigerate for up to 2 weeks or freeze for up to 3 months.)

Frangipane:

1 cup unsalted butter, softened

½ cup ground almonds

¼ cup icing sugar

¼ cup all-purpose flour

2 organic eggs

Using an electric mixer, mix butter, almonds, icing sugar, flour and eggs until smooth.

(Make ahead: Transfer to an airtight container

and refrigerate for up to 2 weeks or freeze up to 1 month.)

The results of these juicy little babes were worth the effort, and since it produced eight of them, I was able to offer up a few for friends to try (boy was I popular). No wonder this was titled “A Plum Assignment”.

The book is a must-read and belongs in every cook’s library.

--the Mother


Friday, April 30, 2010

The Bad News Baker

Despite my passion for cooking, I must admit I haven’t quite mastered the art of baking. I am what I like to call, the “Bad News Baker”. Why is it that I can make the tastiest meals, and fail completely when it comes to the sweet stuff? Case in point – the birthday cheesecake that I made for my husband was flatter than Kate Hudson’s chest (pre-boob job). Case #2 - the Sour Cream Coffee cake that I made for Easter tasted like drywall (not that I’ve tasted drywall, it’s just what I assume it would taste like). I could go on, but I think you get my point.

You’d think since I have such a sweet tooth, that I would be a master in the dessert department. Apparently there are some talents that my mother didn’t pass along to me. That being said, if the “Bad News Baker” finds a recipe that she can do with success, I feel that it’s my duty to share it. To all those baking-challenged people of the world, this Brown Sugar Pound Cake is for you…

Brown Sugar and Chocolate Chip Pound Cake with Maple-Espresso Glaze

Cake
Nonstick vegetable spray
1 12-oz. pkg. semisweet chocolate chips
3 cups flour, divided
2 tsp. baking soda
1 tsp. baking powder
¾ tsp. salt
1 cup unsalted butter, room temperature
1 ½ cups (packed) golden brown sugar
2 ½ tsp. vanilla extract
1 tsp. maple extract
4 large eggs
1 cup buttermilk

Glaze
1 cup powdered sugar
2 Tbl. pure maple syrup
2 Tbl. (or more) whipping cream
1 ½ tsp. instant espresso powder

For Cake: Preheat oven to 325º. Butter 12-cup Bundt or Angel Food pan. Spray pan generously with nonstick spray. Dust pan lightly with flour. Mix chocolate chips and 2 Tbl. flour in medium bowl and set aside. Sift remaining flour with baking soda, baking powder, and salt into another medium bowl. Using electric mixer, beat butter and brown sugar in large bowl until fluffy, about 3 min. Beat in vanilla and maple extracts. Add eggs, 1 at a time, beating well after each addition. Mix in flour mixture in 3 additions alternately with buttermilk in 2 additions, beginning and ending with flour mixture. Fold in chocolate chip mixture. Transfer batter to prepared pan, spreading evenly.

Bake cake until tester inserted near center comes out clean and cake begins to pull away from sides of pan, about 1 hour. Cool cake in pan on rack 30 min. Invert cake onto rack and cool complete.

For Glaze: Combine powdered sugar, maple syrup, 2 tablespoons cream, and espresso powder in medium bowl. Whisk until smooth, adding more cream by ½ teaspoonfuls if glaze is too thick.

Source: Bon Appetit Magazine

The cake is pretty rich, but of course that didn’t stop me from cutting big slices. What can I say; I’ve got to satisfy my sweet tooth! Plus, I was proud that I finally produced a baked-good for my family that didn’t deliver bad news along with it!


--the daughter

Monday, April 19, 2010

Dinner and a Movie

I love when Sunday rolls around because it often means Meg and Drew come over for dinner and a movie. It’s a chance for Meg and I to try out new recipes and compare notes on the outcome. The guys are the lucky recipients of food lavished upon them, from appetizers to yummy desserts.

Usually by mid-week, Meg and I e-mail each other about recipes we’d like to try (always seasonal fare), and we “divide and conquer” on the menu. It’s a special time for us because it demonstrates what this blog is about…a mother and daughter learning from each other, sharing cooking secrets, and enjoying a good meal with the family. Of course, seeing a great movie doesn’t hurt either.

Take this past Sunday, for example. I wanted to experiment with the idea of a noodle kugel done in individual 4” springform pans so that, not only would the edges be golden crisp and the interior creamy, but each person would have their own.

Individual Noodle, Chard and Fontina Tortes

1/8 cup olive oil
1 lb. Swiss chard, stems and ribs discarded (spinach would probably work well too!)
1 medium onion, in ¼” slices, halved
2 cloves garlic, finely chopped
¾ tsp. salt
¼ tsp. freshly ground black pepper
¼ lb. dried egg fettucine, broken in half
4 large eggs
½ cup half and half
2/3 cup mascarpone
¼ lb. Fontina cheese, rind discarded and cheese cut into ½” cubes

Preheat oven to 375º. Grease 4 individual (4 ½” dia.) springform pans with 1-2 tsp. (total) olive oil and wrap exterior of pans with foil (to prevent seeping). Cook chard in pot of boiling salted water, uncovered, until just tender, about 3 min. Transfer to sieve, reserving cooking water in pot. Press hard on chard to extract as much water as possible, then transfer to cutting board and chop.

Cook onion in 3 tbl. oil in heavy skillet over moderate heat, stirring occasionally, until softened and golden brown, about 15 min. Add garlic and cook, stirring, 1 min. Stir in chard, ½ tsp. salt and ¼ tsp. pepper and remove from heat. Cool chard mixture to warm. While chard cools, return cooking water to a boil and cook fettucine, uncovered until al dente. Drain pasta in a colander, then transfer to a large bowl and toss with remaining oil. Blend together eggs, half and half, mascarpone and remaining salt and pepper in blender until smooth. Stir chard and fontina into pasta mixture, then stir in egg mixture. Pour into greased pans sets in shallow baking dish. Pat down slightly to level, if needed.

Bake until just set and top is golden brown, 35-45 min. Remove pans to cooling rack for 10 min, then run a small sharp knife around inside edge of pan to loosen tortes. Remove sides of pans and serve torte hot or warm.


These looked really nice plated, and came out with the desired crisp exterior/oozy interior. Because the noodles were “self-contained” in shape, it allows for other food to be placed alongside…in this case, we had a simple tossed Caesar with seared scallops and a crusty piece of French bread. We finished off the chardonnay from Scribe they’d picked up on their picnic the previous weekend to go with it.

Then Meg delighted us with a brown sugar chocolate chip cake with maple espresso glaze. I made her do dessert because she “claims” she can’t do them. Nonsense. It was extra yummy. Do share, Meg, pretty please.

--The Mom

Sunday, April 11, 2010

Taking turns with Tyler

Our family descended on my brother and sister-in-law in Colorado, to visit the newest member of the family…8 week old Tyler. We all took turns feeding him, rocking him to sleep, and changing his diapers (well, I was conveniently absent for most of those diapers!). We also took turns with the cooking, each of us responsible for planning a menu and preparing a comforting family meal.

When it was my turn for dinner, I initially planned on rosemary breaded shrimp over white beans and arugula. Apparently my menu didn’t take into account the limitations of available foods in Pueblo, CO. My mother laughed at me through every aisle of Wal-Mart saying, “Oh sure, arugula – good luck with that Meg!” Okay, change of plans. Wal-Mart had shrimp and bread crumbs so I kept it on the menu, and substituted the beans & arugula for a risotto. I was able to find all the fixings for risotto, so I was in business.

While the gang was busy keeping Tyler occupied, I poured myself a glass of wine and headed for the kitchen to start dinner. First up, getting the risotto started…

Spinach Risotto
2 tbsp Olive oil
5 cups chicken stock
1 onion finely chopped
1 ½ cup Arborio rice
½ cup white wine
3 cups baby spinach
3 tbsp Parmesan cheese

Heat chicken stock in medium saucepan. Heat 2 tablespoons oil in large saucepan over medium heat. Add onion and sauté for 2-3 minutes. Add rice and cook for additional 2 minutes. Add wine and stir until liquid is absorbed, about 2 minutes. Add 1 cup chicken stock and simmer until liquid is absorbed. Continue adding stock 1/2 cup at a time until rice is cooked and mixture is creamy. Continue to stir often, about 25 minutes. Add spinach and Parmesan cheese and butter into risotto. Stir in additional chicken stock as desired. Season to taste with S&P. (I also like to add a little cayenne pepper to spice the risotto up and give it some character).


Breaded Shrimp
1 lb. uncooked shrimp (peeled & deveined)
1 cup bread crumbs
1 tbsp rosemary
1 tlsp olive oil
S&P

Preheat oven to 400. Combine bread crumbs, rosemary, olive oil and S&P in small bowl. Coat shrimp with bread mixture and place on baking sheet. Bake for 10-12 minutes.


We happily filled ourselves with bowls of risotto and breaded shrimp on top. It was the perfect meal to keep us all going for those late night feedings. I guess the saying is true; it certainly does take a village…


--the daughter

Wednesday, March 17, 2010

The Opening of Some Wine....and a Winery


Sounds like the wine country picnic was a big success…everyone well fed, plenty of wine to sample, gorgeous vineyards in sight and, most important, friends in attendance. Meg had solicited my thoughts on a “parting gift” for the guests and we talked about several ideas...when I remembered something funny I’d seen at the liquor store; it looked like a giant Q-tip that was bent at the end. It was a wine decantor brush. Aha! Add a fun tag (downloaded a corkscrew image off the internet) with a “thanks for joining us”, a festive bow, and you’re in business.Back to the picnic…I ended up contributing a salad to the mix and decided that Ina Garten’s Greek Salad* is one of our favorites and just perfect to add with the Curried Rice & Artichoke Salad (previous blog) and other picnic fare.

Greek Salad

1 English

cucumber, unpeeled and sliced ¼” thick

1 red pepper, large-dice

1 yellow pepper, large-dice

1 pint cherry or grape tomatoes, halved

½ red onion, sliced in half-rounds

½ lb. feta cheese, ½” diced

½ cup calamata olives, pitted


for the vinaigrette:

2 cloves garlic, minced

1 tsp. dried oregano

½ tsp. Dijon mustard

¼ cup good red wine vinegar

1 tsp. kosher salt

½ tsp. freshly ground black pepper

½ cup good olive oil

Place cucumber, peppers, tomatoes and red onion in a large bowl.

For the vinaigrette, whisk together the garlic, oregano, mustard, vinegar, salt and pepper in a

small bowl. Still whisking, slowly add the olive oil to make an emulsion. Pour the vinaigrette over the vegetables. Add the feta and olives and toss lightly. Set aside for 30 min. to allow the flavors to blend (it lastest quite nicely for several hours in the cooler). Serve at room temperature.

*2009 Ina Garten

Something Meg and I particularly like about Ina’s version of Greek Salad is that she uses halved cherry or grape tomatoes instead of cutting a larger tomato in pieces (which tends to make the salad a little “sloppy”) and she doesn’t use crumbled feta but suggests buying a brick of it and then cubing it so it’s a real bite in the salad. We also find it’s not overly dressed so the taste of the veggies comes through. Nothing worse than being over-dressed, particularly at a picnic.

I bought a couple of light-weight acrylic containers with snap-lock lids to carry the salads. It looked pretty in the jars and made transport easy to the table at Scribe (a brand new to the scene--and yet very old with incredible history-- Sonoma winery). The group was privileged to have enjoyed the ambiance and beautiful surroundings of this winery, officially opening this coming weekend. Check out Food & Wine Magazine's March 16 edition. Maybe the wild time had by all had something to do with the "wild yeast" the winery uses! They were most hospitable to accommodate the group. Highly recommended place to enjoy.

Day done and many happy memories.

--The Mom